Understanding Shoe Goo Basics
Shoe Goo is a versatile adhesive that is primarily used for repairing and extending the life of footwear. It is a strong and durable adhesive that can handle harsh environments and heavy use, making it a popular choice for fixing various types of shoes, including boots, sneakers, and sandals.
One of the main benefits of using Shoe Goo is its ability to create a waterproof bond, which helps protect your shoes from water damage and wear. Additionally, it is flexible, so it won’t crack or break when subjected to the normal movements and bending that occur while walking or running. It can be used to fix broken soles, mend holes in the upper part of the shoe, or reinforce areas prone to wear and tear.
To properly use Shoe Goo, preparation of the shoes is crucial. Start by cleaning the area that needs repair, as dirt and grease can prevent the adhesive from creating a strong bond. Apply the Shoe Goo to the damaged area, with enough coverage to ensure a secure bond. Be sure to follow the manufacturer’s instructions when applying the adhesive.
Typically, it takes about 24 to 48 hours for Shoe Goo to cure fully. During this time, it is essential to store the shoe in a well-ventilated place and maintain a room temperature that is neither too high nor too low. Clamps or other methods of pressure may be applied to hold the shoe together while the adhesive cures.
Remember, Shoe Goo is not just for shoes; it has various other uses, such as fixing cracked CD cases, repairing rowboats, and many more. However, mentioning these other uses when discussing Shoe Goo basics. It is a versatile and valuable tool that can help prolong the life of many different items.
How to Apply Shoe Goo
Preparing the Surface
Before applying Shoe Goo, make sure to clean the surface of your shoes or boots thoroughly, removing any dirt or debris. Use a damp cloth or a soft brush to clean the area you want to repair. Once clean, let the footwear dry completely before proceeding. If needed, you may use 120-grit sandpaper to roughen the edges around any holes or damaged areas, as this will help with adhesion.
Applying Shoe Goo Properly
When you are ready to apply Shoe Goo, squeeze a small amount onto the desired area and spread it evenly with the applicator tip or a small spatula. Allow the adhesive to set for 2-10 minutes before pressing the surfaces together. Be sure to align the parts correctly the first time, as a permanent bond forms immediately upon contact. If you are patching a hole, place a piece of duct tape inside the hole to prevent the Shoe Goo from seeping in.
Utilizing the Applicator Tip
The applicator tip of the Shoe Goo tube can help you achieve a smooth and even layer of adhesive. Hold the tube at an angle and gently squeeze, using the tip to spread the goo across the repair area. If necessary, you can use an ice cube to further smooth out and even the adhesive layer. Be sure not to apply too much Shoe Goo, as it can become difficult to manage and may result in a less effective bond. After applying the Shoe Goo, let it dry for at least 24 hours to ensure a strong bond.
Drying and Curing Process
Drying Time
Shoe Goo typically takes between 24 to 72 hours to dry properly. This time can vary depending on factors such as temperature, humidity, and the thickness of the applied layer. To speed up the drying process, consider using a portable fan to increase airflow around the shoes or placing them near a heater for about an hour.
Curing Time
After the Shoe Goo has dried, it’s important to allow some additional time for the product to cure and reach its full strength. Curing time may also be influenced by environmental factors like temperature and humidity. To ensure the best results, it’s recommended to give the repaired shoes at least 2 to 3 days before wearing them. This will allow the Shoe Goo to bond properly and provide a durable, long-lasting repair.
Common Shoe Goo Uses
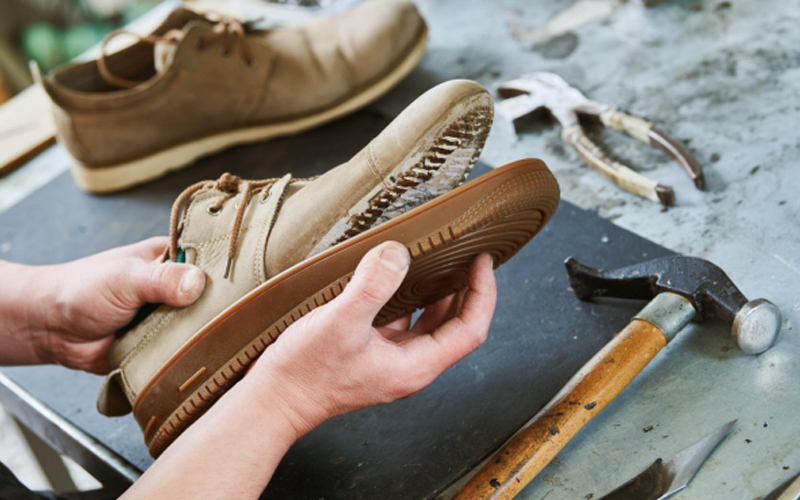
Repairing Damaged Shoe Soles
Shoe Goo is highly effective for repairing damaged shoe soles. It provides a long-lasting, waterproof bond that can withstand harsh environments and heavy use. To repair a damaged sole, first clean the area thoroughly with a damp cloth. Next, apply Shoe Goo to the damaged area, covering it completely. Press the surfaces together firmly, holding them in place for 30 seconds. Allow the Shoe Goo to dry for at least 24 hours before sanding the area for a smooth finish.
Sealing Leaky Shoes
Shoe Goo can also be used to seal leaky shoes, ensuring they remain waterproof and comfortable to wear. First, identify the leaky area and clean it with a damp cloth. Then, generously apply Shoe Goo on the inside of the shoe, covering the leaky area. Allow the adhesive to dry for 24 hours before wearing the shoes. This will create a watertight seal, protecting your feet from moisture.
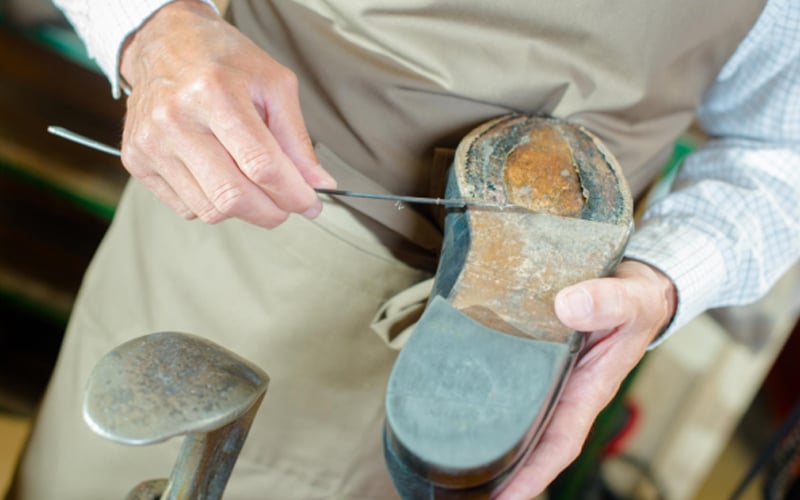
Reattaching Parts
Another common use for Shoe Goo is reattaching parts of shoes, such as loose heels, straps, or other elements that have come apart. To do this, clean both surfaces you want to reattach with a damp cloth, and apply a generous amount of Shoe Goo to one of the surfaces. Press the two surfaces together firmly and hold them in place for 30 seconds. As with the other applications, allow the adhesive to dry for at least 24 hours before wear.
Advanced Shoe Goo Techniques
Customizing Shoes
Shoe Goo can be used for more than just repairing worn-out footwear. You can also use it to customize your shoes to make them unique. To do this, you can follow these steps:
1.Choose your design: Sketch your desired pattern or design onto the shoe with a pencil.
2.Prepare your materials: Gather different colors of Shoe Goo, toothpicks, or a small paintbrush for precise application.
3.Apply the Shoe Goo: Carefully apply the Shoe Goo onto the design, using toothpicks or a small paintbrush for detailed work.
4.Let it dry: Allow the Shoe Goo to dry for 24 hours, ensuring that the added customization is durable and long-lasting.
Reinforcing Sports Footwear
Athletes often wear out their sports shoes faster due to rigorous activities. Shoe Goo can be used to reinforce your sports footwear for added durability and protection. Here’s how:
1.Identify high-wear areas: Examine your sports shoes to locate the areas that experience the most wear, such as the toe or heel.
2.Clean and prep the area: Use a damp cloth to clean the shoe’s surface in the areas you want to reinforce, then let it dry completely.
3.Apply a thin layer of Shoe Goo: Apply a thin, even layer of Shoe Goo to the high-wear area, using a scrap piece of plastic or an old credit card to spread it out.
4.Smooth out any bumps: Smooth out any lumps or ridges with a toothpick or your finger (make sure to wear gloves for safety).
5.Repeat if necessary: For extra reinforcement, apply additional layers of Shoe Goo after the previous layer has dried completely.
6.Allow to dry: Let the Shoe Goo dry for at least 24 hours before using your reinforced sports shoes.
Tips and Tricks for Best Results
Dealing with Excess Goo
Shoe Goo can sometimes be accidentally applied too generously. In such cases, one can use a toothpick, an old credit card, or a small flat-edged putty knife to scrape off the excess Shoe Goo before it dries . However, do this gently to avoid damaging the material of your footwear. It is also important to clean the tools immediately after use to prevent the adhesive from sticking to them. Additionally, you can apply masking tape around the area to be repaired. This makes cleaning up the excess Goo easier, ensuring a neat and professional finish.
Increasing Durability
To ensure the best bonding results and increase the durability of the repaired footwear, several steps can be taken. Firstly, prep the surface by cleaning and drying it thoroughly before application. Remove any debris and use a fine sandpaper to slightly roughen the area where the Goo will be applied. This will help the adhesive grip the material better.
When applying Shoe Goo, it is crucial to do so in a well-ventilated room and at an optimal temperature between 70°F and 85°F. Apply a thin layer of Shoe Goo and press the surfaces together with even pressure for a strong bond. You can use clamps, rubber bands, or simply hold the surfaces together for a few minutes to ensure they adhere well.
Lastly, allow for ample curing time to maximize durability. It takes roughly 24 hours for Shoe Goo to set, and around 48-72 hours to cure fully. Avoid wearing or placing stress on the repaired area during the curing period to give the adhesive time to strengthen.
By following these tips and tricks, you can ensure optimal results when using Shoe Goo for your footwear repairs.
Safety and Storage Recommendations
Precautions During Use
When using Shoe Goo, it is important to take certain precautions to ensure safety. This adhesive contains chemicals that can be hazardous if not handled properly. Always wear protective gloves to avoid direct contact with the skin. Eye or face protection is also recommended, along with appropriate clothing. Make sure to read and understand the safety instructions before handling this product.
It’s crucial to work in a well-ventilated area to minimize the inhalation of fumes. Keep Shoe Goo away from children and pets, and never ingest it.
Storing Shoe Goo
Proper storage is essential to extend the life and efficiency of Shoe Goo. An interesting yet effective method of preserving this adhesive is by freezing it. Placing the Shoe Goo container in a sealed plastic bag and storing it in the freezer can help maintain its original consistency.
Remember to thaw it at room temperature before using it again, and ensure the lid is securely closed after each use. By following these safety and storage recommendations, you can confidently use Shoe Goo to repair and maintain your footwear.